Monday, April 30, 2012

Disney Delights

Untitled
Photo by Dramowhisk
Thanks for coming back to week two of Disney Delights! A question was posed on Facebook a few days ago about favorite times to be in the parks. This got me thinking about some of the special access times I was allowed to be there. I have two favorite times, but for the purpose of this week's blog I'm only going to discuss one: late at night!

When I was part of the Walt Disney World College Program one of my friends invited me to an after hours movie shown in the theater in World Showcase, France. This was something they did every few weeks for the College Program kids, and since they were showing one of my favorite musicals (that particular night it was Phantom of the Opera) I jumped at the chance to go.

It was so much fun to sit back with my friends in such a beautiful space, munching away on our snacks, watching a great movie. The best part, though, was leaving after the movie. Imagine, if you will, the beautiful glow of Epcot at night. Now, remove all of the crowds and sounds and that is what my friends and I had laid before us: The park was left to us and the night workers, with everything lit  up and music quietly playing.

I remember distinctly the four of us skipping in the World Showcase, barefoot (the street cleaners had just come through) laughing and acting like little girls again. It is a memory I will always cherish, a group of girls I will never forget, at the place that means most to me.
The ‘365 In Home Disney Dining Challenge’!


Some of the girls of the MAGIC 24.7 Radio Crew are proud to announce a project that they feel will truly bring a whole new aspect on cooking with a Disney twist. Taken from the inspiration of Julie Powell in her journey to cook all of the famous Julia Child’s recipes, Ashley from www.acupofdisney.com, Mia from www.bibbidibobbidibake.com and Krystal from www.partnersbehindthemouse.com have teamed up to cook 365 days with Disney. The ‘365 In Home Disney Dining Challenge’ is being set up by them to showcase their cooking adventures of literally cooking one Disney style recipe every day of the coming year. This challenge will also give the different views from an expert cook, to a beloved baker and a busy stay at home mom.
Starting Monday, March 26, 2012, and ending March 26, 2013, they will each blog twice a week by taking turns in cooking from famous Disney cooking books and more every day of the year. These recipes will include everything and anything from Disney inspired meals, desserts, drinks and more. You will be able to hop to each one of their blogs each day for a new recipe and how-to; complete with a difficulty key to let you in on just how much work you will be putting into each recipe. Each Sunday, their blogs will recap their cooking for the week. Each one of their blogs will also host a page with their completed recipes so you will have easy access to cook along with them in your home! Also, be listening each month for a recap show in the works to be on air on MAGIC 24.7 Radio.
You will not want to miss this exciting and innovative project Ashley, Mia and Krystal are embarking on. Follow them on Twitter to keep up with more at Ashley @ACupofDisney, Mia @BibbidiBBakeM and Krystal @MagicalDisMom. They are excited to be bringing Disney Dining home every single day of the week and encourage you to cook along with them all year long.

Sunday, April 29, 2012

Yule Log

Merry Christmas everyone! What we're making this month is a yule log (or more commonly known as Bouche Noel) with a yummy peppermint filling, and gorgeous red roses on top. Normally I would make the roses from frosting, but as everyone knows, the holidays are hectic so this time of year is all about producing something quality (and pretty), while simplifying. What I ended up doing was purchasing a few red roses from my local store, and placing them on top of, and around, the yule log to create hints of Beauty and the Beast.

Permet de commencer (lets begin)!

What you will need:

The log
1/4 teaspoon cream of tarter
1 cup all purpose flour
1/4 teaspoon salt
5 egg yolks
5 egg whites
2 tablespoons sherry
Powdered sugar for dusting
jelly roll pan
dish towel

Filling
1 cup whipping cream
1/4 sifted powdered sugar
3 teaspoons peppermint hot chocolate powder

Frosting
2 ounces ghiradelli (or any other brand) unsweetened chocolate
2 tablespoons butter
1/2 teaspoon vanilla
2-3 tablespoons of milk

Yeilds 10 servings

Begin by greasing and lightly flouring a 15x10x1 inch jelly roll pan, and then set aside. Stir together the flour and salt in a small bowl. Then beat egg yolks and sherry in a large bowl on high for about 5 minutes, till the mixture is thick and lemon colored. Gradually add 1/2 cup of the sugar, beating till sugar is almost disolved. 

Then wash the beaters. Beat egg whits and cream of tarter on medium speed till soft peaks appear. Gradually add remaining sugar, 2 tabelspoons at a time, beating on medium to high speed till stiff peaks form (what that means is the tips stand strait). Fold in 2 cup of the egg white mixture into egg yolk mixture. Fold egg yolk mixture into remaining egg white mixture. Fold in flour mixture, and spread in prepared pan. 

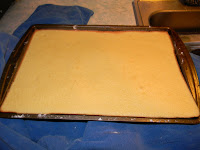
Bake on 375 degree for about 12 to 15 minutes, or till top springs back. Immediately loosen cake from pan. Invert cake on to a towel sprinkled with powdere sugar. Roll up warm cake and towel jelly roll style, staring from a short side. 


For the filling all you'll need to do is beat the whipping cream, powdered sugar, and peppermint hot chocolate powder together until soft peaks form. After the roll has cooled, gently unroll and put a generous helping of the filling, and spread eveninly. Then roll the log back up and prepare for frosting.


To make the frosting, create a double boiler effect by putting the unsweetened chocolate into a metal bowel, and placing that on top of a saucepan that has some boiling water in it. Add in the butter and stir until it has evenly melted. After that, stir in the sifted powdered sugar, vanilla, and milk. Remove from stove top, and let cool for a few minutes. Then, it's time to frost the yule log. 


After covering with the frosting,the log effect is created by taking a fork and lightly pulling it through the frosting. Then, place your roses and petals on and around the yule log (I added powdered sugar for a snow effect, and actually prefer it with just the dark chocolate). You are now finit!


Avoir un Joyeux Noel et Bonne Nouvelle Annee (have a Merry Christmas and Happy New Year)!

Home Adventures of Epcot Style France

Back in December, my dear friend (and fellow Princess Procrastinator), Holly, decided to take me on a mini French Adventure for my birthday. I have always had a love of anything French, and was drawn in to Paris in Epcot. Holly had found a blog by a woman from France (for those interested in reading French Girl in Seattle) who missed home and was looking for local places to help ease her homesickness.

 The blog provided information about all the places to go to feel as though you truly were in France. So, we set out for the town of Madison (which is in Seattle). We started by eating at the restaurant Voila!. The service was incredible, as was the food. Their menu reminded me of Chefs de France in Epcot, and so did our waiter (a student who had spent a year backpacking through Europe).

Incredible menu from Voila!
Bristo Burger avec Brie, Truffle Oil, and Wild Mushrooms
After lunch we proceeded to go to Ines Patisserie for some wonderfully fresh made hot cocoa and pastries. The way the patisserie is laid out, customers can view all of the delectable sweets as they are being made. There is plenty of seating, and bright, inviting colors to just sit and people/pastry watch (think Boulangerie Patisserie, but even more quaint with a small home town feel). 

Holly and I with our hot cocoa's
Right before leaving Madison
Finally finishing all of our treats, we decided to head to City People's Mercantile for some shopping. The Mercantile is located near the U District, and has a wide variety of souvenir type merchandise with plenty of it being French. They were several sections of Eiffel Towers, Le Chat Noir pictures, French travel books (and information for traveling around the world), candles, and much much more.  

There was so much left in the town of Madison to explore that it would have taken us several days to see everything. For more information on all of the Frenchy things to do in Seattle, please go to the French Girl in Seattle's blog. A huge thank you to her for sharing her knowledge of little known places! The day was perfect, and had me imagining myself back at Paris in Epcot once more.

Disney Junior Meatloaf Cupcakes


Meatloaf Cupcakes
Happy weekend everyone! As a celebration to end this last week, I decided to revamp a Disney Junior recipe that my friend Holly and I tried (and I briefly blogged about Here) with my two kids, and loved. The original recipe is very health conscious which, while positive, takes away a great amount of flavor. So, by adding a few ingredients back in (and in much smaller amounts than normal), I have made this much tastier, and more interesting. 


You will need:

1 1/4 pound ground beef (or for a healthier option try turkey)
3 large eggs
2 medium carrots, peeled and grated
1/4 cup shredded cheese (or any cheese)
1/4 cup tomato sauce (any spaghetti sauce works)
1 1/2 cups bread crumbs (or piece of bread soaked in milk)
1/4 cup milk
2 tablespoons butter
Salt and pepper to taste
4 potatoes (peel if you'd like, I leave the skin on for extra nutrition)
Food dye (can be Jello/Kool-Aid packet or actual food coloring)


Preheat oven to 350 degrees and either line a muffin tin with liners (there are some adorable Minne Mouse themed liners at Michaels), or grease the bottom well.

Start cutting potatoes, and placing in a pot of water and bring to a boil.

Season and boil potatoes
In a  bowl mix together beef, eggs, carrots, cheese, tomato sauce and bread crumbs. It's best to use your hands to mix everything well together.

Meatloaf mix
Now, place mixture into cupcake tins and make sure to completely fill it so it is at the surface of the tin. Bake for about 22 minutes (or until completely cooked), and then let cool before removing.

Before baking
After baking
While the meatloaf is baking, mix the potatoes, milk, butter, and salt together until it's light and fluffy. Then, add a small amount of food dye to the potatoes (unless a huge quantity of the dye is used, this will not affect the taste). Spread over tops of cupcakes  with either a knife or use a decorative piping bag. Enjoy!

Pre-frosting
Finit!

Lilo and Stitch Inspired Gender Reveal Cake

Gender Reveal Cake
Last year, my friend Krystal asked me to make her a cake for a gender reveal party she was having. I happily agreed, and got set designing. She had requested something that seemed like April Showers Bring May Flowers. And, since she's as passionate about Disney as I am, I  knew I needed to incorporate something Disney in the cake. In thinking, I remembered the summer after we first met, and how we went and saw Lilo and Stitch in the theaters several times.

There was a part of the movie where Stitch takes the Ugly Duckling storybook from Lilo, and reads it outside. The image struck a cord with me, so I decided to put the ducks with the flowers (I cannot take credit for the umbrella, that was Krystal's creation) to allude to the story. 

To make this cake, I used three 10*10 rounds for the first tier and three 8*8 rounds for the second tier. Since the cake needed to be colored on the inside, I chose to do vanilla cake mix for the flavor - I did use a cake mix as I needed consistency in the layers, and that can be the easiest, and least time consuming, way to do it - and used a packet of jello for the color. All that needed to be done was mix the cake batter, and at the last minute gradually poor in the jello packet until the desired color is reached: Because the amount of batter to jello is so great, the jello flavor will not come through in the cake! Bake as directed on the box.

For the frosting, get the recipe here and do a crumb coating on the cake - a crumb coat is a decent layer of frosting applied to the whole cake, and then putting the cake in the freezer to seal in the moisture and reduce the amount of loose crumbs. After the cake has sat in the freezer for between 15-20 minutes, remove and carefully apply the rest of the frosting with your cake spatula. Place in the freezer again, and start to work on the fondant.

Wilton sells fondants pre-colored that are very easy to use (if you're trying to get a very deep color, purchasing pre-done can be much simpler than mixing your own), and I purchased a box that had pastelle yellow, green, blue, and pink. I rolled out the colors to about 1/8" thick, and use the Wilton Flower Press to make the large flower (bottom) and small (top). Then, for an extra magical look, use a paint brush and dust on some powder. Once the fondant flowers are done, simply place them on the cake in whatever array you choose (the fondant and frosting do very well fusing together). I will admit that I left a little gender clue on the outside, but placing two pink flowers next to each other in the back!

Now that the cake has been decorated, put the final touch of rubber ducks around the top tier, gently pressing into the side of the cake. In order to make sure that the ducks are secured on the cake, place the cake back into the freezer after the ducks are firmly against the frosting. 

If you are transporting the cake, and it is not going to be well frozen before going into the vehicle, trim and insert dowel rods between each tier. The added cost is worth it knowing that your cake will arrive in one piece!


Saturday, April 28, 2012

Ralph Brennan’s Jazz Kitchen Beignets


Thank you for coming back for another baking segment with me.  I have  chosen to kick off this spring with  Ralph Brennan’s Jazz Kitchen Beignets; however, instead of making them in the usual square shape I decided to make them Mickey shaped. This is a two day process, but really isn’t as time consuming as it sounds.
What you’ll need:
1 package Active Dry Yeast (make sure to double check the type of yeast)
1-1/2 cups Warm Water
1/2 cup Sugar
1 tsp. Salt
2 Eggs, beaten
1 cup Evaporated Milk (undiluted)
7 cups All Purpose Flour
1/4 cup Soft Shortening (I prefer the butter flavor)
Oil for Frying
Confectioners Powdered Sugar
Yields 5 dozen (really this depends on the size – mine are usually on the large side)
Day 1: To start, sprinkle the yeast over warm water and mix well. Then, add sugar, salt, eggs, and milk and blend. Add 4 cups of flour and blend until smooth. After that add in the shortening and remaining 4 cups of flour.

Now, cover the dough with plastic wrap and place in the refrigerator overnight.
Day 2: Fill a pan full of oil about an inch to an inch and a half high, and heat it to about 400 degrees. Then, lightly flour a surface to roll out the dough. Remove the dough from the fridge, and roll it out to an 1/8th inch thick.
It is now time to cut the dough into the shape of Mickey Mouse! Like I mentioned on the show, I would normally make this much easier by using a Mickey shaped cookie cutter, but it hasn’t arrived from the Disney Store yet. So, what I did was use a very sharp knife, and cut by hand.


Shaping by hand (and messing with the dough in general) may sound difficult but it really isn’t – my five year old daughter, Reyna, was right along side me after watching some of Princess and the Frog!
My three year old son, Ken, also tried to get in on the baking action!
After getting the shapes correctly done, place the beignets in the hot pan full of oil.
Because of how hot the oil is, make sure to have full attention on the beignets for safety! The beignets are done once both sides are a golden brown (in my pan, this was about two minutes on each side). Now that they’re done, remove and set on a plate and give a generous dusting with powdered sugar.
I hope every one of you takes the time to do these – they really are a wonderful treat, and something the whole family will enjoy!

Earth Day Crush Rolls


Family Dinner Fun

I love having family sit down dinners several times a week, but with two young kids it’s sometimes a struggle to actually make a quality meal while monitoring all they’re doing, and yet keeping them included and entertained. While struggling to come up with something to do this week, I remembered an old idea my own mother did with me, but with a twist (because everything nowadays has to have a twist!): it needed to be Disney]! What she used to have me do was turtle bread, which is basically several rolls combined together to make a large turtle, while she was doing something else. So, why not take this Finding Nemo style and make several small turtles -err, Crush’s- for the little ones!
Ingredients:
1 cup milk
1/3 cup sugar
5 tablespoons butter
1 teaspoon salt
2 packages(4 1/2 teaspoons) active dry yeast
4 1/4-4 1/2 cups flour
2 eggs
Raisins or cranberries
Start by combining the milk, sugar, butter, and salt into a bowl and microwaving for about 3 minutes (or until 120 degrees if you have a baking thermometer).
Microwavable ingredients
Then, combine the yeast and two cups of flower in a mixing bowl. Add in the milk mix and eggs and beat on low setting for two minutes. Add the other cup of flower and continue beating for another 2-3 minutes. Then, mix in as much of the flower that’s left as possible.
Best yeast to use for homemade bread
Begin mixing flour and yeast
Now kneed the bread dough on a lightly floured surface for 3-5 minutes (the dough should be slightly elastic and smooth). Once that is done, place in a bowl and cover with a towel in a warm place for once hour.
Finished post kneeding dough
It is now time for the fun part! After the dough has risen, punch it down, and start dividing into 16 equal pieces. Now take those portions, and divide out the body, head, legs, and tail (shaping how you feel best to make your turtle). Once you have everything shaped, tuck a small part of the legs, tail, and head under the body of the turtle. Then, cover with a damp towel and let rise for 30 minutes (longer if the room is cold).
Little Crush
With scissor detailing
Before baking the Turtles, cut raisins (or cranberries, my own personal choice) in half and pushing them into Crush’s head for eyes. Then, take some scissors and cut into the legs to make them look like webbed flippers, and on the back to look like a shell. Now bake at 350 degrees for 12-15 minutes, or until a light, golden brown.
Top detailing