Showing posts with label Baking Tips. Show all posts

Friday, May 4, 2012

Whispering Canyon Cafe's Strawberry Banana Bread

Originally I was going to be making cornbread (who doesn't love that?), but found this recipe and knew I had to give it a try! I have never made any form of banana bread before, and love the idea of trying it for the first time in adding strawberries. It's definitely something my kids love, and will be a family favorite snack!


You will need:

1 cup butter, softened
2 cups granulated sugar
2 cups ripe bananas (about 6 medium size), mashed
4 eggs
1 teaspoon salt
2 teaspoons baking soda
3 cups flour
1 1/2 pounds frozen sliced strawberries, thawed


First, pre-heat oven to 325 degrees, and grease your bread pans. Then, cream the butter and sugar together, and gradually add in the bananas. Once that is well mixed, scrape sides of the bowl, and add the eggs in one at a time (make sure each egg is mixed well before moving on to the next one).

Bananas and eggs
In another bowl, mix the flour, baking soda, and salt together. After the butter/banana mix is done, add this and stir well. Add the strawberries and stir until everything is well mixed. Pour into bread pans, and place in oven for 60-70 minutes, or until a toothpick inserted into the center is removed with no crumbs.
After flour mix has been added
Stirring in strawberries
Completed bread


Tuesday, May 1, 2012

Liberty Tree Tavern's Apple Cobbler

Disney Apple Cobbler
Thank you for coming back to yet another week in our Challenge! In choosing this recipe, I knew I wanted to do something that was baked, and that I had never attempted before. I found the cobbler, and not only did it sound delicious (I will admit to never trying the Liberty Tree Tavern, but I definitely will now!), but I would get to learn how to make a pie crust! It turned out delicious (though I would make a few, minor, changes), and reminded me of something my Grandmother would have made.

Pie Crust Dough:
3 ½ cups all purpose flour
2 tablespoons sugar
1 teaspoon salt
2 sticks unsalted butter cut into ¼ inch pieces
4 tablespoons Crisco – Vegetable

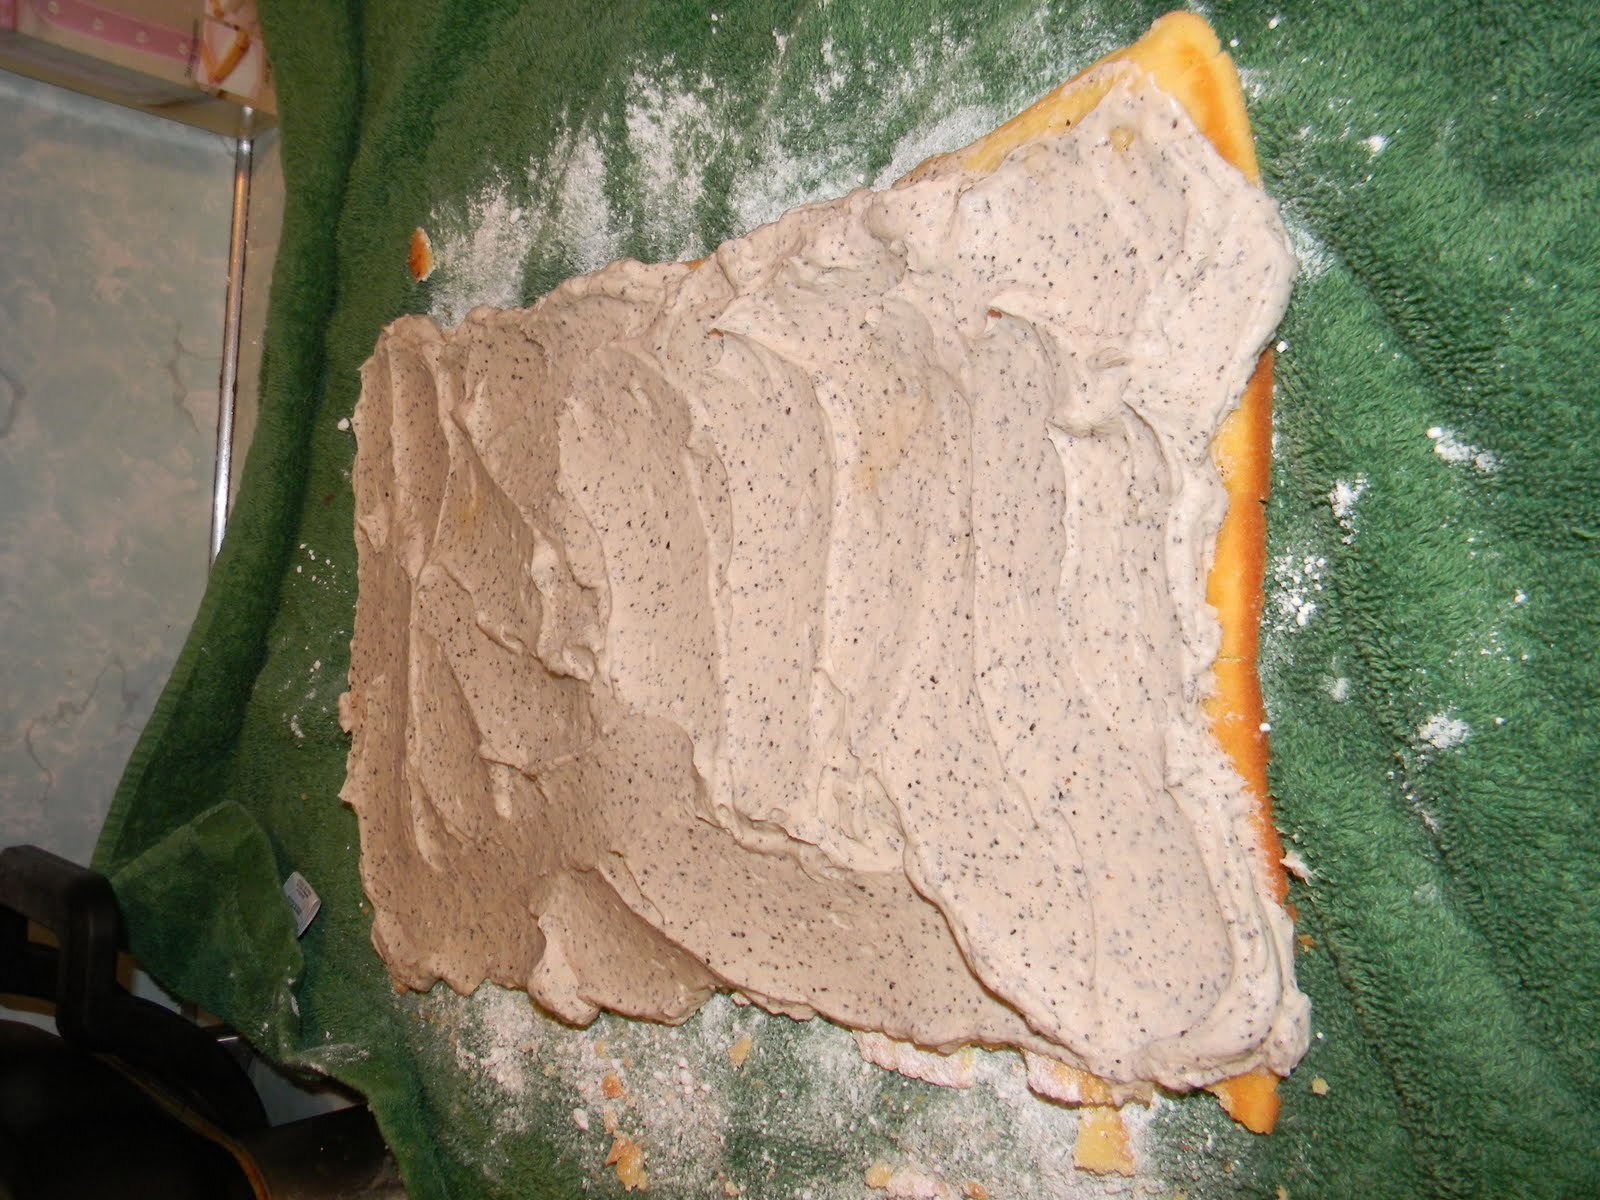
Start by pre-heating the oven to 300 degrees. Then, sift flour, sugar, and salt into a bowl. Using hands, add the Crisco (personal choice is Butter Flavor) and butter and work everything together until it is coarse and crumb-like. Add 2 tablespoons (may require more) of ice water and continue to mix with hands until dough forms. Roll out dough on a lightly floured surface. Once it is at desired length/width place in a greased 13*9 pan.
Dry dough ingredients
Dough after water has been added
Roll out enough dough to cover the bottom of the pan
Cover only the bottom

Apple Filling:
4 pounds Baking Apples – Golden Delicious
½ cup Sugar
1 ½ cups Brown sugar
½ teaspoon Nutmeg – ground
½ cup Flour

Cut apples into thin slices (suggestion that has been made is to peel the apples as well), and fry in a pan for 2-3 minutes. Sift the sugar, brown sugar, nutmeg, and flour. Mix in with the apples, and cook until apples are soft. Chill the mixture, and then place on top of the dough
Apples with sauce
Apple mix on top of dough

Cream Cheese Filling:
8 ounces Cream cheese – softened at room temperature
1 each large egg
2/3 cup sugar
1 teaspoon Vanilla Extract

Mix all ingredients together and pour on top of the apple/dough combination. Slightly swirl the filling in.

Oatmeal Streusel:
¾ cup All –purpose flour
½ teaspoon Cinnamon – ground
½ cup Brown Sugar – packed
¾ cup Rolled Oats (I used regular oatmeal)
½ cup Butter – Unsalted

Combine all ingredients together and, with hands, crumble until a course mixture. Sprinkle on top of the apple/dough/filling combination and bake for 1 hour and 15 minutes in the center of the oven.
Cream Cheese Filling with Streusel
Finished baking and ready to serve!
Serve with ice cream and enjoy!

Join Krystal tomorrow for the next 365 dining recipe at www.magicaldismom.com

Monday, April 30, 2012

The ‘365 In Home Disney Dining Challenge’!


Some of the girls of the MAGIC 24.7 Radio Crew are proud to announce a project that they feel will truly bring a whole new aspect on cooking with a Disney twist. Taken from the inspiration of Julie Powell in her journey to cook all of the famous Julia Child’s recipes, Ashley from www.acupofdisney.com, Mia from www.bibbidibobbidibake.com and Krystal from www.partnersbehindthemouse.com have teamed up to cook 365 days with Disney. The ‘365 In Home Disney Dining Challenge’ is being set up by them to showcase their cooking adventures of literally cooking one Disney style recipe every day of the coming year. This challenge will also give the different views from an expert cook, to a beloved baker and a busy stay at home mom.
Starting Monday, March 26, 2012, and ending March 26, 2013, they will each blog twice a week by taking turns in cooking from famous Disney cooking books and more every day of the year. These recipes will include everything and anything from Disney inspired meals, desserts, drinks and more. You will be able to hop to each one of their blogs each day for a new recipe and how-to; complete with a difficulty key to let you in on just how much work you will be putting into each recipe. Each Sunday, their blogs will recap their cooking for the week. Each one of their blogs will also host a page with their completed recipes so you will have easy access to cook along with them in your home! Also, be listening each month for a recap show in the works to be on air on MAGIC 24.7 Radio.
You will not want to miss this exciting and innovative project Ashley, Mia and Krystal are embarking on. Follow them on Twitter to keep up with more at Ashley @ACupofDisney, Mia @BibbidiBBakeM and Krystal @MagicalDisMom. They are excited to be bringing Disney Dining home every single day of the week and encourage you to cook along with them all year long.

Sunday, April 29, 2012

Yule Log

Merry Christmas everyone! What we're making this month is a yule log (or more commonly known as Bouche Noel) with a yummy peppermint filling, and gorgeous red roses on top. Normally I would make the roses from frosting, but as everyone knows, the holidays are hectic so this time of year is all about producing something quality (and pretty), while simplifying. What I ended up doing was purchasing a few red roses from my local store, and placing them on top of, and around, the yule log to create hints of Beauty and the Beast.

Permet de commencer (lets begin)!

What you will need:

The log
1/4 teaspoon cream of tarter
1 cup all purpose flour
1/4 teaspoon salt
5 egg yolks
5 egg whites
2 tablespoons sherry
Powdered sugar for dusting
jelly roll pan
dish towel

Filling
1 cup whipping cream
1/4 sifted powdered sugar
3 teaspoons peppermint hot chocolate powder

Frosting
2 ounces ghiradelli (or any other brand) unsweetened chocolate
2 tablespoons butter
1/2 teaspoon vanilla
2-3 tablespoons of milk

Yeilds 10 servings

Begin by greasing and lightly flouring a 15x10x1 inch jelly roll pan, and then set aside. Stir together the flour and salt in a small bowl. Then beat egg yolks and sherry in a large bowl on high for about 5 minutes, till the mixture is thick and lemon colored. Gradually add 1/2 cup of the sugar, beating till sugar is almost disolved. 

Then wash the beaters. Beat egg whits and cream of tarter on medium speed till soft peaks appear. Gradually add remaining sugar, 2 tabelspoons at a time, beating on medium to high speed till stiff peaks form (what that means is the tips stand strait). Fold in 2 cup of the egg white mixture into egg yolk mixture. Fold egg yolk mixture into remaining egg white mixture. Fold in flour mixture, and spread in prepared pan. 

Bake on 375 degree for about 12 to 15 minutes, or till top springs back. Immediately loosen cake from pan. Invert cake on to a towel sprinkled with powdere sugar. Roll up warm cake and towel jelly roll style, staring from a short side. 


For the filling all you'll need to do is beat the whipping cream, powdered sugar, and peppermint hot chocolate powder together until soft peaks form. After the roll has cooled, gently unroll and put a generous helping of the filling, and spread eveninly. Then roll the log back up and prepare for frosting.


To make the frosting, create a double boiler effect by putting the unsweetened chocolate into a metal bowel, and placing that on top of a saucepan that has some boiling water in it. Add in the butter and stir until it has evenly melted. After that, stir in the sifted powdered sugar, vanilla, and milk. Remove from stove top, and let cool for a few minutes. Then, it's time to frost the yule log. 


After covering with the frosting,the log effect is created by taking a fork and lightly pulling it through the frosting. Then, place your roses and petals on and around the yule log (I added powdered sugar for a snow effect, and actually prefer it with just the dark chocolate). You are now finit!


Avoir un Joyeux Noel et Bonne Nouvelle Annee (have a Merry Christmas and Happy New Year)!

Lilo and Stitch Inspired Gender Reveal Cake

Gender Reveal Cake
Last year, my friend Krystal asked me to make her a cake for a gender reveal party she was having. I happily agreed, and got set designing. She had requested something that seemed like April Showers Bring May Flowers. And, since she's as passionate about Disney as I am, I  knew I needed to incorporate something Disney in the cake. In thinking, I remembered the summer after we first met, and how we went and saw Lilo and Stitch in the theaters several times.

There was a part of the movie where Stitch takes the Ugly Duckling storybook from Lilo, and reads it outside. The image struck a cord with me, so I decided to put the ducks with the flowers (I cannot take credit for the umbrella, that was Krystal's creation) to allude to the story. 

To make this cake, I used three 10*10 rounds for the first tier and three 8*8 rounds for the second tier. Since the cake needed to be colored on the inside, I chose to do vanilla cake mix for the flavor - I did use a cake mix as I needed consistency in the layers, and that can be the easiest, and least time consuming, way to do it - and used a packet of jello for the color. All that needed to be done was mix the cake batter, and at the last minute gradually poor in the jello packet until the desired color is reached: Because the amount of batter to jello is so great, the jello flavor will not come through in the cake! Bake as directed on the box.

For the frosting, get the recipe here and do a crumb coating on the cake - a crumb coat is a decent layer of frosting applied to the whole cake, and then putting the cake in the freezer to seal in the moisture and reduce the amount of loose crumbs. After the cake has sat in the freezer for between 15-20 minutes, remove and carefully apply the rest of the frosting with your cake spatula. Place in the freezer again, and start to work on the fondant.

Wilton sells fondants pre-colored that are very easy to use (if you're trying to get a very deep color, purchasing pre-done can be much simpler than mixing your own), and I purchased a box that had pastelle yellow, green, blue, and pink. I rolled out the colors to about 1/8" thick, and use the Wilton Flower Press to make the large flower (bottom) and small (top). Then, for an extra magical look, use a paint brush and dust on some powder. Once the fondant flowers are done, simply place them on the cake in whatever array you choose (the fondant and frosting do very well fusing together). I will admit that I left a little gender clue on the outside, but placing two pink flowers next to each other in the back!

Now that the cake has been decorated, put the final touch of rubber ducks around the top tier, gently pressing into the side of the cake. In order to make sure that the ducks are secured on the cake, place the cake back into the freezer after the ducks are firmly against the frosting. 

If you are transporting the cake, and it is not going to be well frozen before going into the vehicle, trim and insert dowel rods between each tier. The added cost is worth it knowing that your cake will arrive in one piece!


Monday, April 16, 2012

Buttercream Frosting Perfected

If you're anything like me as a mom and a baker, you're always looking for ways to make treats extra special with ease. Before reading some tips from the one and only Cake Boss, I found it easiest to get my frosting in a can and go from there. Now, I know that there are a few simple things to making the lightest, fluffiest, and tastiest homemade buttercream frosting.

First things first, ingredients:

1 pound of confectioners sugar
1 cup of butter flavored shortening (any shortening works, but this flavor is best)
1 teaspoon vanilla extract (clear works best, but if coloring frosting, any will do)
Milk

Start by sifting your confectioners sugar. This takes about two minutes to do, and will really help alleviate any lumps in the final frosting product. I always try to sift it directly into my mixing bowl. The reason for this is to help get rid of any excess air (more air means heavier frosting).

Sift a full pound of sugar
Sift well
For the next step, use your dough hook instead of whisk for mixing - this is another tip to help keep down the amount of air being mixed into your frosting. Put the dough hook in place prior to setting up your bowl, and then add all ingredients except for the milk. Begin mixing, and little by little add in milk and stop when it as your choice of consistency (I use about 4 teaspoons full. If you're wanting to do more than ice a cake - piping on letters, for example - start out with a teaspoon and then separate batches and add more for whatever else you happen to be doing).

The wonderfully versatile dough hook
Mix well until wanted consistency
Now that the frosting has actually been completed, try adding in a bit of color. Normally, I do this by dipping a toothpick into the color and dragging it through the frosting. For a deeper color, I will remove a chunk of the food coloring and mix on high. Once you are satisfied with the color, put into a piping bag and start making cute designs!
Use about 1/2tsp of color
Finit! 
Tips:
  1. Use butter flavored shortening instead of regular - it really helps with the flavor.
  2. Only use butter if you are simply frosting a cake. The butter taste is wonderful, but very difficult for decorating. This is true even if you decide to make buttercream frosting with butter and use a more stiff frosting for decorations - everything will simply slide.
  3. Sift the confectioners sugar to avoid extra air pockets, and to make sure that there are no clumps in the finished product.
  4. Instead of a regular whisk, use a dough hook to also keep the extra air from getting in. Make sure the dough hook is already in place before setting up your mixing bowl.

Friday, April 13, 2012

Easy Breezy Vanilla Cake Recipe


Recently I was in need of a vanilla cake recipe (completely from scratch) - one that could be duplicated with ease and have very similar results. For any of you who have not yet baked from scratch yet, let me say that it is so hard (especially with cake) to have it turn out the same way more than once. Exact amounts of ingredients need to be used, and still things can sink, burn, be flat, too dense, etc.

I ran across this gem, and saw that the reviews were through the roof. I decided to give it a try, and have already made 3 batches in 24 hours. 

You will need:

  • 1 cup white sugar
  • 1/2 cup butter
  • 2 eggs
  • 2 teaspoons of vanilla extract
  • 1 1/2 cups all purpose flour
  • 1 3/4 teaspoons of baking powder
  • 1/2 cup of milk (it was suggested on the recipe to use 3/4 cups instead. I did and it was worth it!)

Begin by preheating your oven to 350 degrees. Then, grease and flour the bottom of your cake pan (this is meant for a 9*9 pan or cupcakes, but can be easily accommodating to other sizes). Please make sure that the grease/flour mixture is only on the bottom as this helps the cake rise. If you're worried about the ability to remove the cake once it's done, just let it cool a few minutes and then take a knife gently around the edges of the cake. It will, I assure you, easily pop out. 

Now it's time to cream together the butter and sugar. Then add the eggs one at a time followed by the vanilla. After that has mixed, combine the flour and baking powder and add to the liquid mix. Then, add the milk.

If you're making a cake, bake this for 30-40 minutes, for cupcakes it takes about 20-25 minutes. The way to know if the cake is done is not only by the tried and true toothpick test (insert pick into the middle of the cake and remove, if comes out clean it's done) but also by touch. If you can touch it and it springs back up, the cake is ready!

For a very easy (and pretty) topping to your cake I have a delicious cream cheese and strawberry recipe.

You will need:

  • 8 ounces of cream cheese (room temperature)
  • 1 cup of whipping cream (or purchase pre done)
  • 1/4 pound of powdered sugar
  • Strawberries

Combine all of the ingredients, except for the strawberries, in a mixer until it is thick and creamy. If you are making your whipping cream from scratch (best taste ever!) make sure to whip it first before adding everything else (just place the liquid in the bowl and mix on high for about 3 minutes, or until peaks form). After it is thick and tasty, spread on top of cake and place cut strawberries on top in whatever design you choose.

Friday, February 24, 2012

Chocolate Dip


As mentioned on our show, I recently made some Mickey cookies (which I will have a vlog posted here soon with the recipe and instructions) dipped in chocolate. I was originally going to wait and post the instructions for the chocolate with the vlog; however, in thinking about it I feel I'll just share it now as this chocolate can be used for anything. I have actually used it as a cake filling as well as a dip for cookies. It can also be used to cover fruit, and is super easy (and quick) to make.

You will need:


  • 1 cup of semi sweet chocolate
  • 1 tablespoon of butter
  • 2 tablespoons of milk
  • 1 double boiler (if you do not have one, simply use a sauce pan, but monitor melting constantly)

Recipe found on Cooks.com

Start by mixing all of your ingredients together: If using a double boiler, set to medium/high heat, if in sauce pan set on low. Continually stir chocolate as it melts, and make sure it is spread evenly, and not clumping at the bottom of the pan. Chocolate should be sufficiently melted after about 2 minutes, and can be removed from the stove top. Now, dip in cookies or fruit and set aside on parchment paper or a cookie rack to allow the chocolate to firm up.

Another use for this chocolate is to pour into a mold and freeze for a mini chocolate treat.

Enjoy!


Pin It

Wednesday, November 23, 2011

Mickey Cupcakes


Hey Everyone! Welcome to this months Bibbidi Bobbidi Bake with Mia. I really hope you all enjoyed listening to the show, and will try out these delicious cupcakes!


What is wonderful about these cupcakes is the small list of ingredients. All you will need is :

1 cake mix (plus ingredients listed on the box)
1 package of Oreo's
1. box of whipping cream
1/2 cup of sugar
2 teaspoons vanilla
1 can of sweetened condensed milk
1 paint brush

Serving: Yields 18 cupcakes

So, what I did first was use a chocolate cake mix (or substitute any other flavor) and added a few dollops of sour cream (this just adds a little extra moisture to the cake, and doesn't leave behind any flavor). While the cupcakes were baking I started to make some homemade caramel. Though this sounds difficult, it's actually really easy. All it takes is putting the can of sweetened condensed milk in a pot of boiling water for 2 hours (you have to make sure the can stays covered by water, and is always laying on its side or else the pressure can cause an explosion). By the end of the boiling process you get a delicious, and rich, caramel.

While everything cools, start making up some homemade whip cream to substitute as frosting. Just poor the whole container of whipping cream into a bowl and start mixing until peaks form. At that point, gradually add sugar and vanilla. Once that is done, whip on high until at your choice of consistency. I like mine a bit on the stiff side, so I whipped it for about 2 more minutes.
After this is done, take a paint brush and dip it into the caramel. From here, take an Oreo and paint a Mickey directly on top of it and immediately put into the freezer for about 2 minutes. While the cookies are in the freezer, cover all the cupcakes in the whip cream and drizzle some of the caramel on top. Then, one the design on the cookie is firm, place the Mickey designed Oreo standing up in the middle of the cupcake.

Upcoming confections - next month I will be featuring a chocolate yule log (also known as Buche de Noel) with hints from Beauty and the Beast. This has always been popular with my family during the holidays, and adds an extra layer of beauty to any holiday table!